Note: if you have difficulty selecting a surface which is co-planer or co-linear with another, AutoCAD provides a "cycling" feature which highlights one co-planer or co-linear entity at a time. For example, if you ctrl+left click once on the edge where a wall meets the ceiling, AutoCAD will show at the prompt: "<CYCLE ON>". Then if you left click (without the control key) on the edge, either the wall or the ceiling will be highlighted. If you left click again, the other will be highlighted.
For more information on how to select/deselect entities, see "Chapter 7 -- Editing Methods" in the AutoCAD help system.
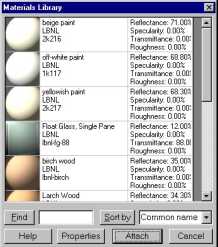
Figure 2. The Materials Library dialog box.
Notes: You will not see the attached Desktop Radiance materials in AutoCAD entities. They will only be visible (rendered) in a Desktop Radiance simulation. To see if you have successfully attached materials to the ceiling and walls, use Radiance—> Materials—> Show all attached materials. This will highlight all the surfaces which have attachments. For more complicated drawings, the Radiance—> Tools—> Show All Unattached maybe a more suitable tool.
A surface in Desktop Radiance is considered infinitely thin and can have only one material attached to it. It cannot have two different materials, one on the front and one on the back.
Therefore surface normal for opaque surfaces is irrelevant.