![]() The rview parameters define the level of accuracy for the simulated image. The settings in this dialog box will determine if your model will simulate an image quickly or more slowly to a high level of accuracy. In the rview parameters dialog box you can manipulate things such as the number of ambient bounces that should take place. For information on choosing recommended values for rview parameter settings see the Desktop Radiance User ManualTips and TechniquesSetting Rendering Options. This table will give you minimum, maximum, fast, and accurate values. In addition it tells you particular settings that can greatly affect the rendering time of your model.
The rview parameters define the level of accuracy for the simulated image. The settings in this dialog box will determine if your model will simulate an image quickly or more slowly to a high level of accuracy. In the rview parameters dialog box you can manipulate things such as the number of ambient bounces that should take place. For information on choosing recommended values for rview parameter settings see the Desktop Radiance User ManualTips and TechniquesSetting Rendering Options. This table will give you minimum, maximum, fast, and accurate values. In addition it tells you particular settings that can greatly affect the rendering time of your model.
Ambient Parameter Tab
The Set ParametersAmbient dialog boxbelow sets the parameters for the ambient light in the scene. To access the Ambient Parameters dialog box go to rview—>Set—>Parameters and click on the AMBIENT tab.
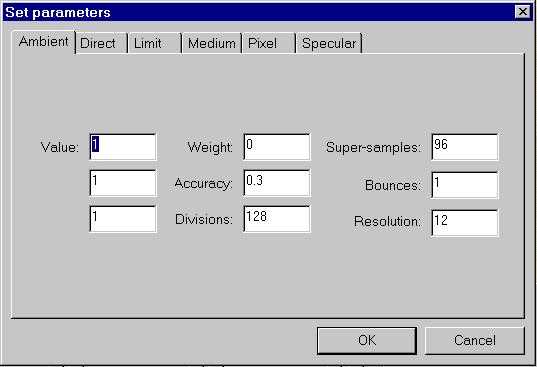
Figure 14. The Ambient Tab in the Parameter Dialog Box
Value: three boxes representing red (top), green (middle), and blue (bottom). Increasing these values evenly can make the scene darker, decreasing them will make it lighter.
Weight: the average weight of the indirect light. As new indirect lights are computed the average value will be modified. For a scene that includes indoor and outdoor spaces, a value of zero is appropriate and is the default.
Accuracy: the accuracy of the ambiently lit areas of the model. The smaller the number, the smoother the rendering. A value of zero is very accurate. A value of 0.3 is a reasonable level to begin with. The range of possible values that can be entered is between 0 and 0.5. Lower numbers are more accurate.
Divisions: the number of divisions in the ambient light. A value of zero implies no indirect calculation. A reasonable value to begin with is 128. The range of possible values that can be entered is between 0 and 4096. Higher numbers are more accurate.
Super-samples: applied to ambient divisions that show a big difference in value from one to the other. A reasonable value to begin with is 96. The range of possible values that can be entered is between 0 and 1024. Higher numbers are more accurate
Bounces: the maximum number of diffuse bounces that will be computed by the indirect calculation. To have no indirect calculation, enter a value of zero. For a medium quality rendering, a value of 2 or 3 is reasonable. The range of possible values that can be entered is between 0 and 8. Higher numbers are more accurate. If your rview rendering first appears very flat and shadowless, a low value for the ambient bounces setting is usually the cause.
Resolution: the rendering of the ambient light areas of the model. A value of zero means that there is an unlimited amount of resolution. A reasonable value to begin with is 12.
Direct Parameters Tab
The Set ParametersDirect Dialog Box sets the parameters for the direct light in the scene. To access the Direct Parameters dialog box, go to rview—>Set—>Parameters and click on the DIRECT tab.
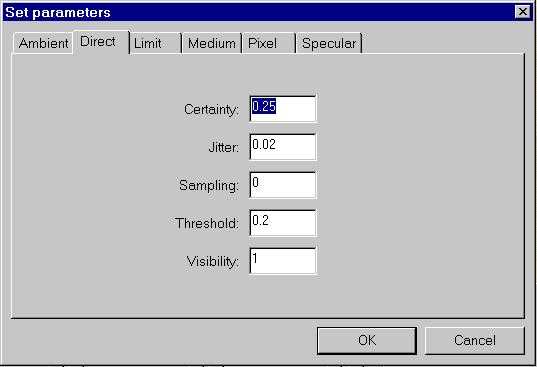
Figure 15. The Direct Parameters Dialog Box
Direct-Certainty: value of one guarantees that the absolute accuracy of the direct calculation will be equal to or better than that given in the Direct—>Threshold value. A value of zero insures that all shadow lines resulting in a contrast change greater than the specified Direct—>Threshold value will be calculated. A reasonable value to begin with is 0.25. The range of possible values that can be entered is between 0 and 1. Higher numbers are more accurate.
Direct-Jitter: controls the smoothness and accuracy of penumbras or soft shadows. A value of zero means that shadows will be rendered without penumbras and a value of 1.0 will maximally sample large area sources to provide the smoothest possible penumbras.
If direct jitter is greater than 0.0 then pixel sampling must be 1.0. A good value to use for direct jitter is .67 when smooth shadows are desired. This parameter can greatly increase rendering time so use with caution. A reasonable value to begin with is 0.02. The range of possible values that can be entered is between 0 and 1. Higher numbers are more accurate.
Direct-Sampling: subdivides a light source until the width of each sample area divided by the distance to the illuminated point is below this ratio. This assures accuracy in regions close to large area sources at a slight computational expense. A value of zero turns source subdivision off, sending at most one shadow ray to each light source. Large area sources are subdivided into at most 64 patches which can lead to "hot spots" on immediately adjacent surfaces.
Direct-Threshold: minimum light value that a light source must have to be tested for shadows. A value of zero means all light sources will be tested for shadows. A reasonable value to begin with is 0.2. The range of possible values that can be entered is between 0 and 1. Lower numbers are more accurate.
Direct-Visibility: allows you to make light sources appear black when looked at directly, but light output will still be taken into account for the simulation and analysis. A value of zero will turn off the light source visibility. Any number greater than zero will turn it on.
Limit Parameters Tab
To access the Limit Parameters dialog box, go to rview—>Set—>Parameters and click on the LIMIT tab.
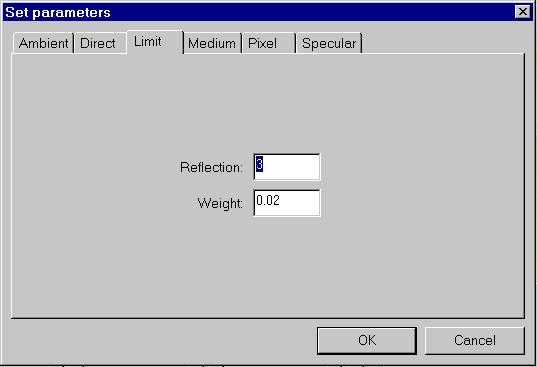
Figure 16. The Limit Parameters Dialog Box
Limit-Reflection: defines the maximum number of specularly reflected and refracted rays that can be spawned for each initial view ray. A reasonable value to begin with is 3. The possible range of values that can be entered is between 0 and 16. Higher numbers are more accurate.
Limit-Weight: the weight function stops the generation of specular rays when the potential contribution is less than the specified minimum value. If the amount measured is less then the specified minimum weight, additional rays will not be traced. A reasonable value to begin with is 0.02. The possible range of values that can be entered is between 0 and 0.05. Lower numbers are more accurate.
Medium Parameters Tab
Parameters in the Medium tab affect the way light is traced through "participating media" such as mist or fog. Volumes of participating media must be modeled with the appropriate Radiance material. Such materials are not yet available in Desktop Radiance.
To access the Medium Parameters dialog box, go to rview—>Set—>Parameters and click on the MEDIUM tab.
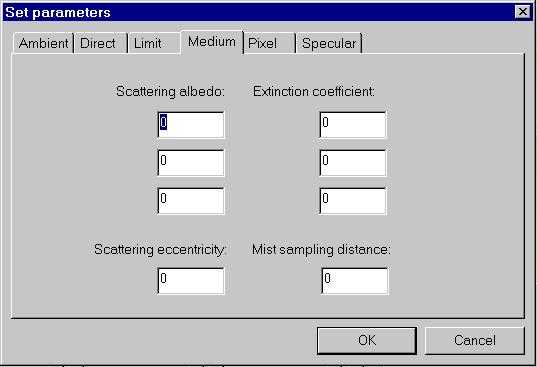
Figure 17. The Medium Parameters Dialog Box
Scattering Albedo: determines whether light from a medium is absorbed or scattered. From top to bottom the boxes stand for Red light, Green light, Blue light. Only values between 0 and 1 can be entered. A zero will cause all light not transmitted by a medium to be absorbed. A one will result in all light not transmitted to be scattered elsewhere.
Extinction Coefficient: refers to the distance that light will be scattered or absorbed. The three boxes from top to bottom stand for red light, green light, blue light.
Scattering Eccentricity: defines how much light scattering will tend towards the forward direction. Only values between 0 and 1 can be entered. A value of one will result in the most forward tending light scattering.
Mist Sampling Distance: defines the distance between samples taken during a source scattering. A value of zero means that only one sample will be taken.
Pixel Parameters Tab
To access the Pixel Parameters dialog box, go to rview—>Set—>Parameters and click on the PIXEL tab.
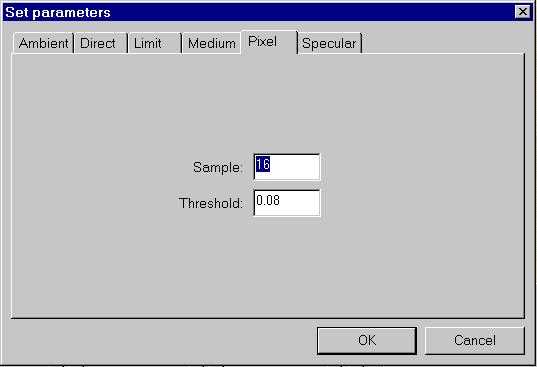
Figure 18. The Pixel Parameters Dialog Box
Sample: defines the amount of space in pixels that can be used for subdivisions on the image plane. A reasonable value to begin with is 16. The range of values that can be entered is between 1 and 16. Lower numbers are more accurate.
Threshold: if two adjacent pixel samples differ by more than this amount, a third sample will be taken. A reasonable value to begin with is 0.08. The range of values that can be entered is between 0 and 1. Lower numbers are more accurate.
Specular Parameter Tab
To access the Specular Parameters dialog box, go to rview—>Set—>Parameters and click on the SPECULAR tab.
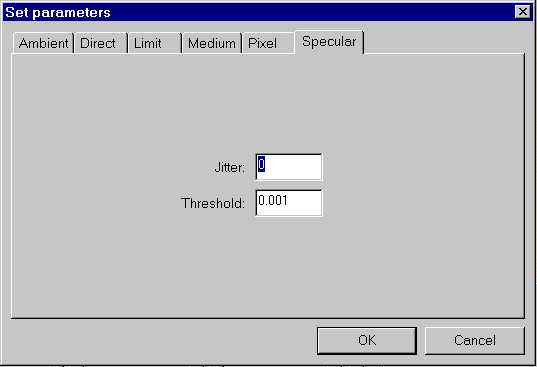
Figure 19. The Specular Parameters Dialog Box
Jitter: the amount that specular semi-highlights will be sampled. A value of zero will turn off specular sampling causing all light reflections to appear sharp. A value of one will make all specular reflections fully sampled allowing for soft reflections. A reasonable value to begin with is 0. The range of values that can be entered is between 0 and 1. Higher numbers are more accurate. Changes in this value have no effect on rendering time.
Threshold: the minimum specularity of materials under which specular sampling is not performed. A value of zero means specular sampling will always take place. A value of one means specular sampling will not take place at all. Values between 0 and 1 will selectively allow specular sampling, for those materials whose specularity is above the specified value. A reasonable value to begin with is 0.001. The range of values that can be entered is between 0 and 1. Lower numbers are more accurate.