
The Advanced Calculation Properties dialog boxes are a series of settings under the main categories of Analysis, Lighting, Geometry, and Rendering. They are most commonly used in the final steps of creating a highly accurate, high quality rendering. To access these dialog boxes select ADVANCED on the Simulation Setup dialog box. Many of these settings are also found in the interactive rendering program, rview. The settings in rview are intended to allow the user to quickly and easily test different values and settings. When ideal settings are found, then the user can make the changes in the Advanced Calculation Properties dialog boxes which will save the setting with the scenario. After making changes in the Advaned Calculation Properties dialog boxes a high quality batch mode simulation can be made by selecting batch on the simulation setup dialog box.
The Advanced Calculation Parameters Analysis dialog box includes settings that can help with the analysis of images created in a Radiance simulations.
Figure 3. Advanced Calculation Parameters "Analysis" Dialog Box
The settings in the Image Exposure section affect how light/dark your image will be. By selecting Auto (linear average), the exposure will automatically be set to 1. This is a good exposure starting point. If you have a specific value or you want the image to be darker or lighter than usual, then use the absolute settings or the relative f-stop settings.
The "Use Custom Post-processing Settings" checkbox refers to whether you are using a PFILT setting other than the default. If you are using a different value then this box should be checked.
The Save Z-buffer data check box applies to animations only.
The Advanced Calculation Parameters Lighting dialog box refers to settings that have to do with how light will act within your model.
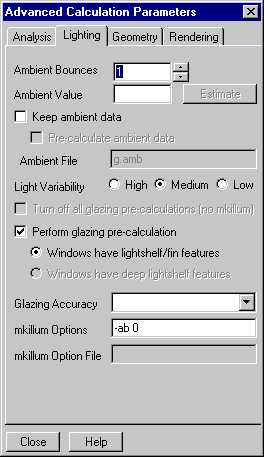
Figure 4. Advanced Calculation Parameters "Lighting" Dialog Box
Ambient bounces sets the number of times light will bounce from surface to surface. The lower the number, the faster the calculation. A reasonable number to use is anywhere between 1 and 5. For a batch mode rendering, 1 ambient bounce works well.
Ambient Value affects how generally light or dark the image is.
The Advanced Calculation Parameters Geometry dialog box deals with certain Graphic Editor related settings, many of which are also found directly within the Radiance pulldown menu.
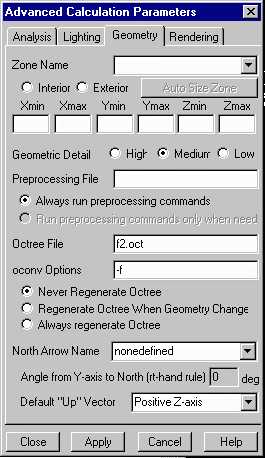
Figure 5. Advanced Calculation Parameters "Geometry" Dialog Box
This dialog box allows you to define a zone. A zone is a volume of space that indicates an area where the simulation should focus on. To define a zone begin by entering a name for the zone. Then select the zone to be either interior or exterior. Interior means that you will be looking at the space from within the space. Exterior means that you will be looking at the space from outside the space.
The 6 point definition boxes are for defining a rectangular volume aligned parallel to the xyz axes.
The Advanced Calculation Parameters Rendering Dialog Box determines the pictorial quality of the simulation image rendering from your Radiance model.
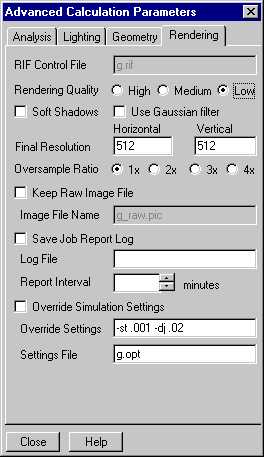
Figure 6. Advanced Calculation Parameters "Rendering" Dialog Box
The RIF Control File box shows the name of the file that you are dealing with. This box will already be set and can't be changed here.
Rendering quality sets the quality of the simulation. With the soft shadows box checked, there will be no sharp shadows and rendering time will be longer.
Final resolution determines the sharpness of the rendered image. The horizontal and vertical boxes should have numbers that are exponentials of 2. For a high quality rendering choose 1024 horizontal and 1024 vertical. For a lower quality rendering 512 x 512 will do fine.
Oversample Ratio is what affects jagged lines. By increasing this value, lines will become smoother. Although, increasing this value greatly increases rendering time. Increasing the oversample from 1x to 2x will increase rendering time by 4 times.